A walk-through of how I made this easy to maintain but featureful static website using Jekyll based on a Docker development workflow. Although this required some ramp-up to getting started, making changes is trivial. All the steps outlined below should be easy to follow and include a brief explanation to help you learn!
Jekyll has become a popular tool for generating static websites for anything from blogs, project website or documentation portals. The main reason it got my attention was that it can give the appearance of a rich dynamic website but is ultimately just a set of generated HTML files. It also provides an easy way to mix HTML and markdown to get the flexibility you sometimes need with the simplicity you prefer which makes it easy to really add new content. Jekyll also powers GitHub Pages behind the scenes which allows you to serve content purely from your GitHub repository.
You are looking at the live version of this website based on the source repo eyjohn/evdev.me but NOT hosted on GitHub Pages.
Objectives
By the end of this process, I want to:
- Generate a simple static website
- Customise my website to give it my personal feel
- Be able to easily add posts without worrying about databases
- Use a
docker powered development workflow for jekyll
Prerequisites
Before trying this, you will need to know about the following:
- General understanding of static websites and how they are hosted
- Familiar with
markdown and HTML
- (Optional) A basic understanding of how
docker works and a working setup
Getting Started
Firstly, let’s create and initialise a workspace and install the necessary tools.
Creating the repository
mkdir evdev.me
cd evdev.me
git init
Setup Jekyll
I will be using docker to run jekyll rather than installing it on my system. This is because I plan on creating a CI/CD pipeline built on top of containers which I will explore in a future post. You can, however, install it natively on your system which I will not be covering.
I chose the jekyll/jekyll dockerhub images which are provided by this repo jekyll-docker and has great documentation. Let’s write a quick wrapper script to easier to invoke the container while we develop:
docker_jekyll:
#!/bin/bash
docker run --rm \
  --volume="$PWD:/srv/jekyll" \
  --volume="jekyll_cache_$(basename $PWD):/usr/local/bundle" \
  -it jekyll/jekyll "$@"
A fixed version can also be specified, although I just chose to use the latest available at the time (3.8.5).
NOTE: it is important that your Docker volume mounts work correctly, initially my setup: WSL + docker (minikube) did not preserve Unix execution mode correctly, and I lost HOURS to this as my gems would fail to install!
Get Jekyll to create a new site
I was impressed by the default website generated by Jekyll, had it not been for my preference of dark themes, I would have stuck with it. To get started simply run this command inside your directory:
./docker_run jekyll new .
Running it for the first time might take some time, also you may need to use –force if the directory is non-empty.
This generates the following files:
evdev.me/
├── 404.html
├── Gemfile
├── Gemfile.lock
├── _config.yml
├── _posts
│   └── 2019-06-23-welcome-to-jekyll.markdown
├── about.md
├── docker_jekyll
└── index.md
Build and Serve website
You can now build (generate static files) or serve (build and serve over HTTP) this project. A jekyll serve --watch workflow is a popular development workflow. In my case I simply ran:
./docker_run jekyll serve --watch # takes a few seconds to start
Output:
ruby 2.6.3p62 (2019-04-16 revision 67580) [x86_64-linux-musl]
Configuration file: /srv/jekyll/_config.yml
            Source: /srv/jekyll
       Destination: /srv/jekyll/_site
 Incremental build: disabled. Enable with --incremental
      Generating...
       Jekyll Feed: Generating feed for posts
                    done in 2.409 seconds.
 Auto-regeneration: enabled for '/srv/jekyll'
    Server address: http://0.0.0.0:4000/
  Server running... press ctrl-c to stop.
Which looks like:
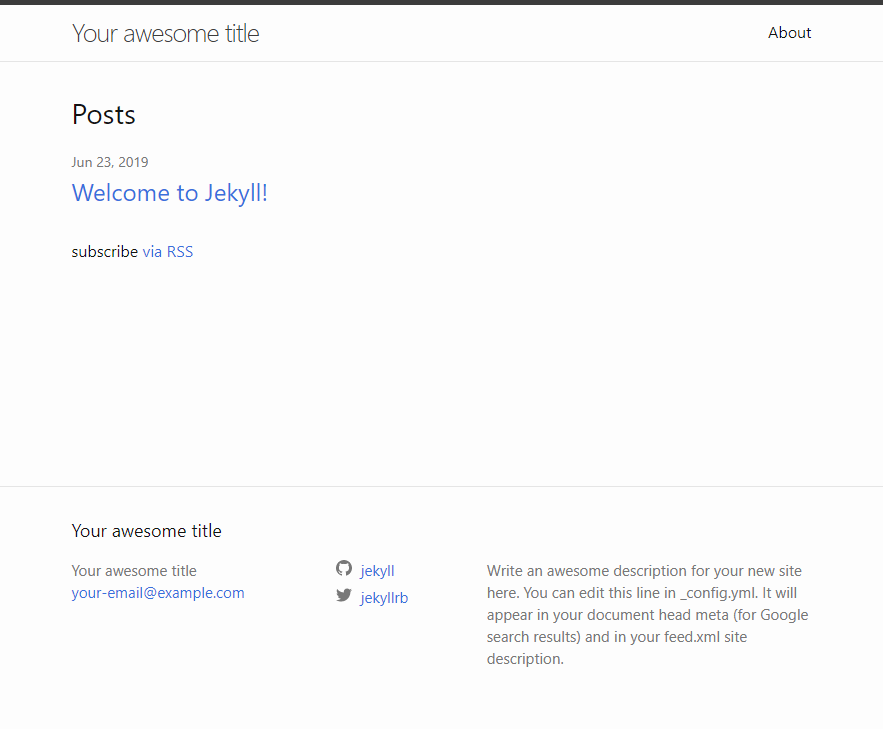
Now that the boilerplate is out of the way, I can start personalising it.
Customising the website
Unless you plan on using the default theme, DO NOT start modifying any config files or templates yet as some themes may use different config or layout structure so you may end up losing any progress you make.
Changing Theme/Layout
I regretted starting to customise the layout of the default theme minima and the config as I had to scrap many of the settings when I installed a new theme. I chose a free theme contrast which includes a dark variant that I like and I used this as my starting point. Although the customisation process may be different between themes, it is likely to follow similar steps:
1. Installing your theme
The contrast theme had the option to use a “remote” install (not copying all the layouts) which is documented here.
Alternatively, some themes would require you to start with their template repository.
Some features may require you to install Jekyll plugins which can be done by changing the jekyll_plugins section in your Gemfile.
2. Configuring your site
Edit the _config.yml file with your own settings. In the cast of contrast, it came with good documentation for the options available.
In some cases, I had to update Gemfile and edit or overload layout files.
3. Adjusting layout assets
Depending on how you installed your theme, you will have to either:
- Local Install (all theme assets in repo)
Adjust existing layouts
- Remote Install (theme assets in bundle/remote)
Copy existing layouts into _layout and modify as appropriate
Jekyll will search for _layouts and _includes in your base folder first, which allows any file from themes to be simply overridden by creating a copy in your base folder.
Adding new posts
This was incredibly easy, simply add a new file in _posts folder, either as markdown or HTML. You simply need to add the Jekyll Front Matter (top YAML section between the two ---). Here is a simple example of an article in markdown:
---
layout: post
title:  "Making this website with Jekyll"
date:   2019-06-23 13:26:01 +0100
categories: [jekyll, docker]
tags: [jekyll, website, docker, favicon]
---

A walk-through of how I made this easy to maintain but featureful static website using **Jekyll** based on a **Docker** development workflow. Although this required some ramp-up to getting started, making changes is trivial. All the steps outlined below should be easy to follow and include a brief explanation to help you learn!

And now for another paragraph...
Unless otherwise specified in the excerpt_separator setting of the configuration file, the first paragraph will be generally used as the excerpt when generating article list pages.
Adding or updating pages
Both the default minima theme and the contrast themes both included a default index page which was easily customisable. In my case, I chose to enable the pagination version which I felt provided a better experience and also rendered an article excerpt in the listing.
I also wanted to add a couple of extra pages, such as an about, search and contact page. This was even easier than adding a post, simply add the Front Matter as before, followed by your HTML or markdown content. For example:
---
layout: page
title: About
permalink: /about/
---

Hey, here is a page about me!
In addition, I had to add the page to the navigation section of my _config.yml in order for it to be listed in my navigation.
Adding dynamic components
The drawback of having a statically generated website is that you are unable to have dynamic content such as comments, search or forms.
The benefit of statically generated websites is that you do not have to! Why not rely on external services to provide this for you?
I was able to easily find and implement three different services that allowed me to have comments, search and a contact form within half an hour!
My theme contrast came with a _config.yml with a comment section providing support for two options out of the box: disqus and isso. I chose to use disqus as it came with a hosted free tier package as opposed to isso which required self-hosting.
After registering on disqus.com and creating a “site” with the short name “evdev”, I simply updated the disqus option of the _config.yaml to “evdev” and that was all.
Search
Google offers a free service called Custom Search Engine which will automatically crawl your website and build a search index for it. You can then expose this as a search form on your own website.
You will need to first register your website and set a URL matching pattern after which you will be given the embed code. After that, I just added a search.html page as follows:
---
layout: page
title: Search this site
permalink: /search/
---
<script async src="https://cse.google.com/cse.js?cx=001363150109788008944:nocet6mejo4"></script>
<div class="gcse-search"></div>
For my contact form, I decided to use formspree as it is free and is ultimately just a form.
While you can pay for better integration where the user feels like they never left your website, I was happy with the free tier which cases the user to be redirected to formspree to pass a captcha and be shown a branded message before being given a link to return to my website.
I simply added a contact.html as follows:
---
layout: page
title: Contact
permalink: /contact/
---

<form action="https://formspree.io/MY@EMAIL.ADDRESS" method="POST">
    <input type="hidden" name="_subject" value="EvDev Contact Form">

    <label for="name">Name: </label>
    <input type="text" name="name" required>
    <br/>

    <label for="email">Email: </label>
    <input type="email" name="_replyto" required>
    <br/>

    <label for="comments">Comments: </label>
    <textarea name="comments" required></textarea>
    <br/>
    <input type="submit" value="Submit">
</form>
Conclusion
Overall Jekyll proved to be a very easy tool to get started with, and even though documentation was easily accessible, most of the time I didn’t feel that I needed it. The fact that at the end of the process, I’m just dealing with static assets made it much easier to host and not have to worry about databases or keeping my website up-to-date.
My biggest pain-points during the whole process were as a result of my Docker powered workflow, or more specifically with my windows powered setup. The main issues were:
- Mounting the cache volume was problematic due to the need for compiled modules
- The
jekyll serve --watch workflow could not detect file changes on my working directory, I had to use the slower --force_polling
- Starting Jekyll in the container was considerably slower than running it on my WSL host
comments powered by